The installation of the circuit kill switches is described in detail in this article.
Kill switches from different companies might have the same appearance as you. However, in terms of electrical operation, the two types of kill switches operate differently. Therefore, it makes sense that you must install them using a different technique.
This article also includes additional advice and cautions on how to handle a kill switch for boats in practical circumstances. So, practicing this procedure shouldn’t be too challenging for you and other sailors. To learn more, keep reading!
Open Circuit Kill Switch
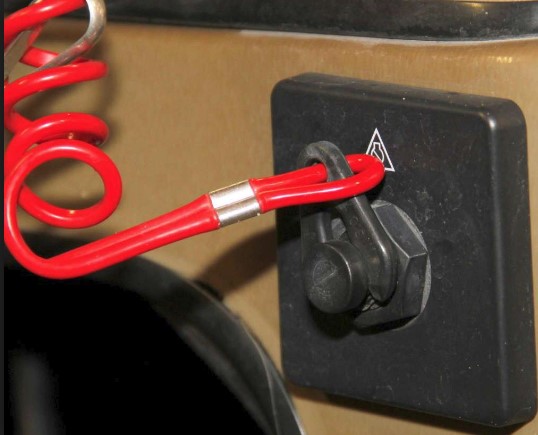
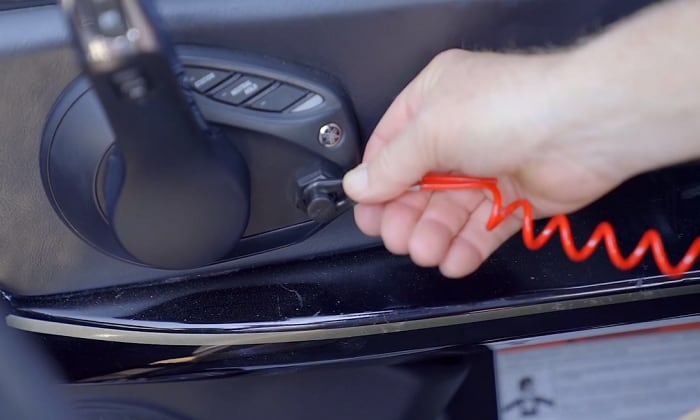
This section highlights the boat kill switch with a lanyard or kills cord. The kill switch is attached to one end of this lanyard, which is then attached to the driver’s arm or leg at the other. This cord must be cut so that the sprung switch can work after the helmsman is expelled from the steering area.
The spark plug serves as the centerpiece of the installation of this kind of kill switch. The electrical system of the engine must be connected to it. Because outboard motors have different wiring, some boat owners may find it difficult to figure out how to wire a killswitch on a boat.
Once you comprehend how things work, things will be simpler for you. So, how does a kill switch work? It is regarded as a straightforward device that relies on a spring-loaded button to maintain the switch’s on state whenever the engine is running.
Below the button is a clip that is attached to a tether, the other end of which is attached to the person in control of the boat. The tether retracts the clip in cases where the driver jumps overboard.
The charge that triggers the spark is diverted when the engine is stopped by this kill switch. Direct connection to the outboard motor is used on smaller boats. In larger boats, the wiring must be routed from the outboard motor to the proper location on the console.
The possibility of mounting this switch to the boat implies that you can attach it to any type of engine. You only need to unplug the button’s wires and connect it to the kill switch if your engine already has a push-button stop switch.

On the front of the motor casing, a kill switch is frequently mounted. One wire, from the ignition points, passes through the terminal of the kill switch. The other wire, which originates from the terminal, is then wrapped around the motor’s metal housing.
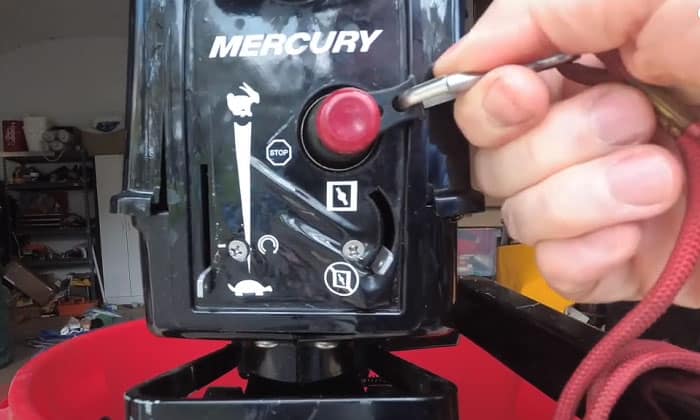
How to Attach the Mercury Kill Switch Lanyard?
A few tools and pieces of equipment must be ready before you can apply the kill switch so that the process will go more smoothly. Here is a list of necessary gadgets for this procedure:
- Marine fuse tank inline (1-3 amp fuse)
- Power drill
- Hole saw (2 ⅛-inch type)
- Strippers and wire cutters
- Crimping tool
Step 1: Installing XHub
Drill a 21/16-inch-diameter hole were necessary for the wheel. The 61/2-inch-long xHub antenna needs to have enough room, so make sure there is. Before fastening the antenna to the antenna mount, remove the nut.
Place the antenna as well as xHub into the hole you created. You must do this while allowing the gasket to rest in the center of the dashboard panel and xHub. This arrangement places the battery indicator at the very top of the display.
In order to connect the five-pin connecting wire at the back of the device, you must manually squeeze the xHub bolt.
Step 2: Power Processing
You must turn off the onboard battery life for safety reasons before attaching the wire to the power supply. A five-wire pigtail with corresponding colors is included in the connection cable.
The positive red wires need to be connected to a dependable 12V DC supply. A marine in-line fuse holder and a fuse ranging from 1 to 3 amps are required for this. The onboard ground connection will then be connected to the black wire.

It might be necessary to lengthen these wires. For this task, a wire measuring 16 or 20 AWG is required.
Step 3: Attaching Signal Wires
The remaining two cables are meant to be attached to the vessel’s existing kill switch. The manufacturer’s website will have a wiring diagram for your specific engine brand.
The gray cable from the xHub should be attached to the black/yellow wire that connects to the mercury kill switch if you have one. The black cable that is also transmitted to the switch should have the orange cable connected to it.
The kill switch can be kept operational with a lanyard. Instead of disconnecting the wires connected to the engine, take them off. merely connecting them using the wireless xHub cables.
Step 4: Assessing the New System
When your boat is docked, you can start evaluating the system. Start the motor if the cables are attached to the current kill switch. Attach the lanyard to the engine and restart it to make sure it still functions.
To see if the motor shuts off, you get off your boat or swim in the water. Both a red light and a warning sound will be turned on. They will be a sign that someone has fallen overboard in real life.
In as little as six seconds, the wireless kill switch’s automated feature can reactivate. By pressing a button on the remote, you can, of course, turn off the engine.
Why is Installing An Outboard Motor Kill Switch Important?
When a sailor loses control of the boat, an outboard kill switch, also referred to as a rope, activates and “kills” the motor. It is typically constructed from a length of sturdy plastic cable with two opposing ends.
The first consists of a string of quick-release hooks that attach to the motor’s kill switch. The other end has a karabiner that clips into the life jacket of the boater or can be made into a loop and wrapped around his leg or arm.
Expert sailors consider a kill switch to be a necessity, despite the US Coast Guard’s requirement that any boat shorter than 26 feet have one installed. This section of the article will explain why you should install a kill switch on your watercraft.
Furthermore, it is necessary for boaters to pay attention to the elements below and avoid encountering accidents caused by these factors:
- Hazardous obstacles
Boulders, logs, and gravel bars might be hidden by high, murky water. These objects pose a risk of separating the boat and the commander if they are unexpectedly encountered.
The boat is able to stay at least in the area where it is trapped thanks to the engine turn-off switch on a vessel, which prevents the motor from running.
- Human mistakes
Unexpected waves or hidden threats could throw boat passengers overboard if a vessel is operated at extremely high speeds, such as when attempting to avoid an unexpected storm.
Tournament bass anglers may sprint to strategic locations at 70 mph, but they are aware of when to slow down and when a craft’s motor kill button is required.
- Enormous waves
In large areas of water, large waves appear to be more likely to occur. The weather can change surprisingly quickly, even with constant forecast monitoring. Rolling, unpredictable waves that aim to throw everything and everyone off the boat may be produced by a strong thunderstorm.
Final Words
In spite of the fact that using a kill switch is not an easy task, it is essential for any boater to comprehend this procedure thoroughly so they can use it when necessary. It won’t take long for you to become accustomed to and increase the safety of you and the other passengers onboard if you frequently practice attaching and using a boat kill switch.
Because this item has a safety component, pay close attention to how it is installed. As a boater, it is your duty to add it to your vessel in accordance with the law. The article is now complete. Please like and share this article if you found it useful if that makes sense.


